
So I started doing some research (big surprise right?!) and found it doesn't seem too hard. THEN I came across this women: Lazardo Art and the art of baby helmet, can I just say OMG. I am obsessed with the aviator helmets. So I contacted for more information and it's just slightly more than I wanted to spend and I'm very worried about the time frame even though I'm assured by many that her turn around is 48 hours. So I found a website, Bling Your Band, that makes stickers for baby helmets. Which also has pretty detailed instructions on how to paint and decorate yourself. So between Bling Your Band's directions and this women's awesome youtube video, I began my adventure into the world of art.
So here is what I started with:
 |
| Ingredients |
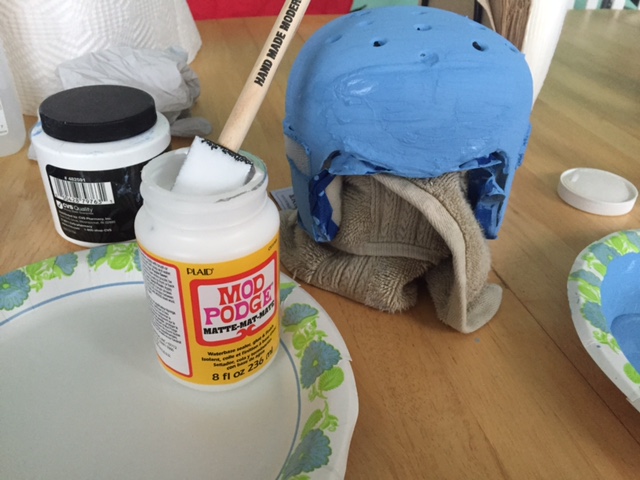
- Craniosynostosis Helmet
- *Unlike the DOC Bands, our helmet is a clear hard plastic
- 2 - 2 oz. container of Acryllic Paint (Sailaway Blue)
- 1 - 8 oz. container of Mod Podge
- 2 sponge brushes
- Papertowels
- Water
- Hair dryer
- Nailpolish Remover
- Painters Tape
To start, I first used the painters tape to outline the helmet. This was pretty difficult since the helmet is curved and a hard plastic. If I am going to do this again, I also recommend taping the entire inside to prevent paint from dripping into the holes and down the helmet.


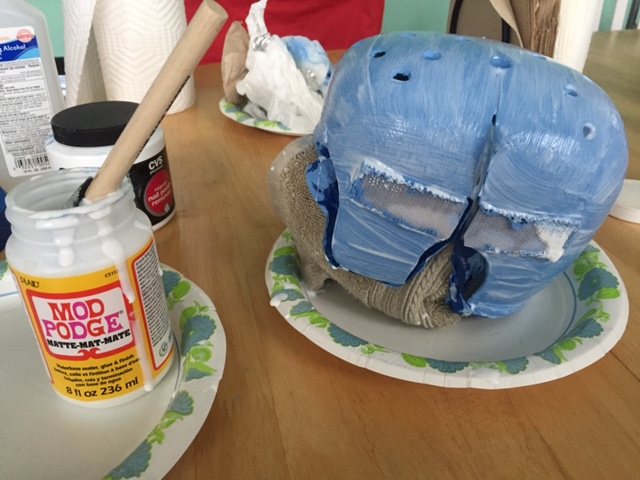
Many recommendations say to sand or prime the helmet first. I did neither since the helmet was clear and the color was going to be close enough.

I painted the entire helmet and gave it three coats. This really only took one, two ounce bottle but because I was heavy handed I ended up pouring two bottles instead. You definitely don't need more than this.


I allowed the helmet to dry over night. In the morning it was still tacky and wet in some spots so I used a hair dryer on cold and blew it dry. If I knew how quickly this would have worked I certainly would have done this last night to finish up.

Once dry, I applied three coats of mod podge. I had never used this stuff before but was thankful of the youtube video or I would have been horribly shocked it came out white!
Again I blew dry this until dry.
Then because I failed to cover the inside I took some rubbing alcohol and gave a quick wipe on the padding inside and then using the nail polish remover (acetone) wiped up all the paint that had dripped down the helmet. It took off nearly almost all of it, which was excellent.

Then it had to immediately go on Benjamin's head. He wore it for three hours on today and one hour off. When I took it off, he had gotten pretty sweaty in it and some of the remaining paint did get in his hair. With a damp paper towel it came right off, so no worries.


No comments:
Post a Comment